Real-World CI/CD DevSecOps Pipeline for Deployment of Python Web-app


Hello friends, we will be deploying a Python Web-app Based Application. This is an everyday use case scenario used by several organizations. We will be using Jenkins as a CICD tool and deploying our application on Docker Contaier. Hope this detailed blog is useful.

Steps:-
Step 1 — Create an Ubuntu T2 Large Instance
Step 2 — Install Jenkins, Docker and Trivy. Create a Sonarqube Container using Docker.
Step 3 — Install Plugins like JDK, Sonarqube Scanner, Maven, OWASP Dependency Check,
Step 4 — Create a Pipeline Project in Jenkins using Declarative Pipeline
Step 5 — Install OWASP Dependency Check Plugins
Step 6 — Docker Image Build and Push
Step 7 — Deploy image using Docker
Step 8— Access the Real World Application
Step 9— Terminate the AWS EC2 Instance
References
Now, lets get started and dig deeper into each of these steps :-
Step 1 — Launch an AWS T2 Large Instance. Use the image as Ubuntu. You can create a new key pair or use an existing one. Enable HTTP and HTTPS settings in the Security Group.

Step 2 — Install Jenkins, Docker and Trivy
2A — To Install Jenkins
Connect to your console, and enter these commands to Install Jenkins
sudo apt-get update

curl -fsSL https://pkg.jenkins.io/debian-stable/jenkins.io-2023.key | sudo tee \
    /usr/share/keyrings/jenkins-keyring.asc > /dev/null
echo deb [signed-by=/usr/share/keyrings/jenkins-keyring.asc] \
    https://pkg.jenkins.io/debian-stable binary/ | sudo tee \
    /etc/apt/sources.list.d/jenkins.list > /dev/null

sudo apt-get update
sudo apt-get install fontconfig openjdk-11-jre
sudo apt-get install jenkins

sudo systemctl enable jenkins
sudo systemctl start jenkins
sudo systemctl status jenkins
Once Jenkins is installed, you will need to go to your AWS EC2 Security Group and open Inbound Port 8080, since Jenkins works on Port 8080.

Now, grab your Public IP Address
<EC2 Public IP Address:8080>
sudo cat /var/lib/jenkins/secrets/initialAdminPassword
Unlock Jenkins using an administrative password and install the required plugins.

Jenkins will now get installed and install all the libraries.

Jenkins Getting Started Screen

2B — Install Docker
sudo apt-get update
sudo apt-get install docker.io -y
sudo usermod -aG docker $USER
sudo chmod 777 /var/run/docker.sock
sudo docker ps
After the docker installation, we create a sonarqube container (Remember added 9000 port in the security group)

docker run -d --name sonar -p 9000:9000 sonarqube:lts-community


2C — Install Trivy
sudo apt-get install wget apt-transport-https gnupg lsb-release

wget -qO - https://aquasecurity.github.io/trivy-repo/deb/public.key | gpg --dearmor | sudo tee /usr/share/keyrings/trivy.gpg > /dev/null

echo "deb [signed-by=/usr/share/keyrings/trivy.gpg] https://aquasecurity.github.io/trivy-repo/deb $(lsb_release -sc) main" | sudo tee -a /etc/apt/sources.list.d/trivy.list

sudo apt-get update

sudo apt-get install trivy -y
Next, we will login to Jenkins and start to configure our Pipeline in Jenkins
Step 3 — Install Plugins like JDK, Sonarqube Scanner, Maven, OWASP Dependency Check, Docker
3A — Install Plugin
Goto Manage Jenkins →Plugins → Available Plugins →
Install below plugins
1 → Eclipse Temurin Installer (Install without restart)
2 → SonarQube Scanner (Install without restart)
3B — Configure Java and Maven in Global Tool Configuration
Goto Manage Jenkins → Tools → Install JDK and Maven3 → Click on Apply and Save
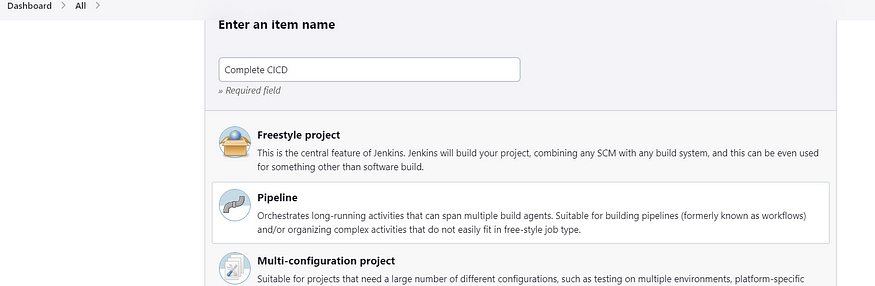
3C — Create a Job
Label it as Real-World CI-CD, click on Pipeline and Ok.
Step 4— Install OWASP Dependency Check Plugins
GotoDashboard → Manage Jenkins → Plugins → OWASP Dependency-Check. Click on it and install without restart.

First, we configured Plugin and next we have to configure Tool
Goto Dashboard → Manage Jenkins → Tools →

Click on apply and Save here.
Step 5— Configure Sonar Server in Manage Jenkins
Grab the Public IP Address of your EC2 Instance, Sonarqube works on Port 9000 , sp <Public IP>:9000. Goto your Sonarqube Server. Click on Administration → Security → Users → Click on Tokens and Update Token → Give it a name → and click on Generate Token

Click on Update Token

Copy this Token
Goto Dashboard → Manage Jenkins → Credentials → Add Secret Text. It should look like this

Now, goto Dashboard → Manage Jenkins → Configure System

Click on Apply and Save
Configure System option is used in Jenkins to configure different server
Global Tool Configuration is used to configure different tools that we install using Plugins
We will install sonar-scanner in tools.

Lets goto our Pipeline and add Sonar-qube Stage in our Pipeline Script
pipeline {
    agent any

    tools {
        jdk 'jdk17'
        maven 'maven3'
    }

    environment {
        SCANNER_HOME=tool 'sonar-scanner'
    }

    stages {
        stage('Git Checkout') {
            steps {
                git branch: 'main', url: 'https://github.com/SushantOps/Python-Webapp.git'
            }
        }

        stage("OWASP Dependency"){
            steps{
                dependencyCheck additionalArguments: '--scan ./ ', odcInstallation: 'DC'
                dependencyCheckPublisher pattern: '**/dependency-check-report.xml'
            }
        }

        stage("Trivy FS "){
            steps{
                sh "trivy fs ."
            }
        }

        stage(" Sonarqube Analysis "){
            steps{
                 withSonarQubeEnv('sonar') {
                    sh ''' $SCANNER_HOME/bin/sonar-scanner -Dsonar.projectName=Python-webapp \
                    -Dsonar.projectKey=Python-webapp '''

                 }
            }
        }
    }
}
Click on Build now, you will see the stage view like this

To see the report, you can goto Sonarqube Server and goto Projects.
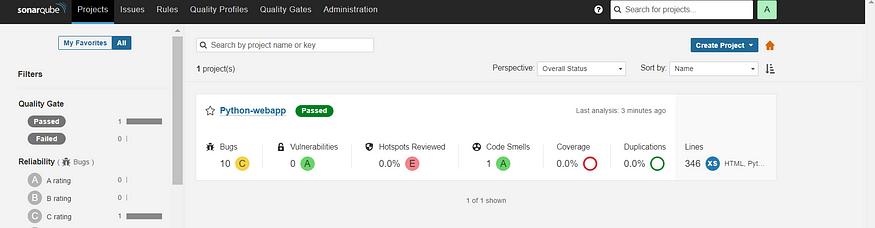
You can see the report has been generated and the status shows as passed. You can see that there are 346 lines. To see detailed report, you can go to issues.
Step 6— we have to install make package
sudo apt install make

# to check version install or not
make -v

Step 7— Docker Image Build and Push
We need to install Docker tool in our system, Goto Dashboard → Manage Plugins → Available plugins → Search for Docker and install these plugins
Docker
Docker Commons
Docker Pipeline
Docker API
docker-build-step
and click on install without restart
Now, goto Dashboard → Manage Jenkins → Tools →

Add DockerHub Username and Password under Global Credentials

When all stages in docker is succesfully created then you will see the result .you log in to Dockerhub, you will see a new image is created

Step 8— Deploy image using Docker
Add this stage to your pipeline syntax
 stage("Deploy to container"){
            steps{
                script{
                    withDockerRegistry(credentialsId: 'docker-cred', toolName: 'docker') {
                    sh "docker run -d -p 5000:5000 sushantkapare1717/python-webapp:latest "
                   }
                }
            }
        }
You will see the Stage View like this,

(Add port 5000 th Security Group)

The final script looks like this,
pipeline {
    agent any

    tools {
        jdk 'jdk17'
    }

    environment {
        SCANNER_HOME=tool 'sonar-scanner'
    }

    stages {
        stage('Git Checkout') {
            steps {
                git branch: 'main', url: 'https://github.com/SushantOps/Python-Webapp.git'
            }
        }

        stage("OWASP Dependency"){
            steps{
                dependencyCheck additionalArguments: '--scan ./ ', odcInstallation: 'DC'
                dependencyCheckPublisher pattern: '**/dependency-check-report.xml'
            }
        }

        stage("Trivy FS "){
            steps{
                sh "trivy fs ."
            }
        }

        stage(" Sonarqube Analysis "){
            steps{
                 withSonarQubeEnv('sonar') {
                    sh ''' $SCANNER_HOME/bin/sonar-scanner -Dsonar.projectName=Python-webapp \
                    -Dsonar.projectKey=Python-webapp '''

                 }
            }
        }

        stage("Docker Build and Tag  "){
            steps{
                script{
                    withDockerRegistry(credentialsId: 'docker-cred', toolName: 'docker') {
                    sh "make image"
                   }
                }
            }
        }

         stage("Trivy Image Scan "){
            steps{
                sh "trivy image sushantkapare1717/python-webapp "
            }
        }
        stage("Docker Push"){
            steps{
                script{
                    withDockerRegistry(credentialsId: 'docker-cred', toolName: 'docker') {
                    sh "make push"
                   }
                }
            }
        }

        stage("Deploy to container"){
            steps{
                script{
                    withDockerRegistry(credentialsId: 'docker-cred', toolName: 'docker') {
                    sh "docker run -d -p 5000:5000 sushantkapare1717/python-webapp:latest "
                   }
                }
            }
        }
    }
}
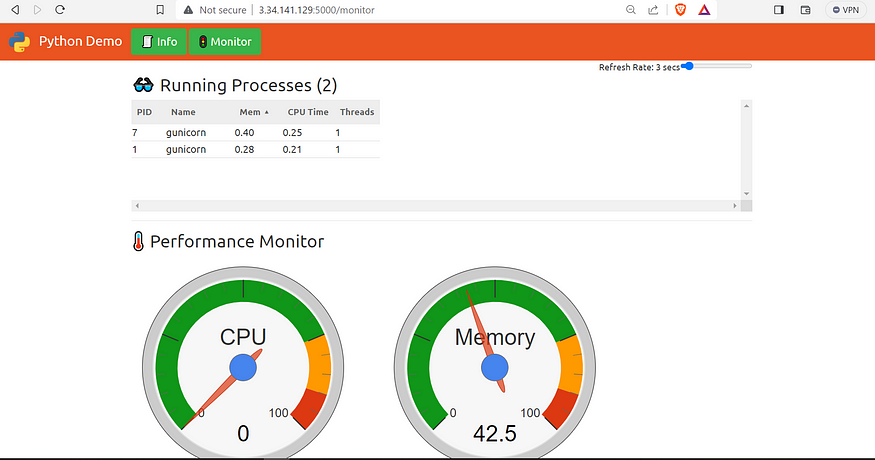
And you can access your application on Port 5000. This is a Real World Application that has all Functional Tabs.
Step 9 — Access the Real World Application


Step 10 — Terminate the AWS EC2 Instance
Lastly, do not forget to terminate the AWS EC2 Instance.
If this post was helpful, please do follow and click the clap 👏 button below to show your support.
Follow me on Linked-in and Github for further updates- https://www.linkedin.com/in/sushantkapare/